Pages

Main Dish Strikes Again!


Tammy: Main Dish
Parker's Fish and Chips
Source: Ina Garten Barefoot Contessa Family Style Cookbook
2002
Prep Time: 15 Minutes
Cook Time: Supposed to be Under 10 Minutes

Ingredients/Directions: Lay 3 lbs. of cod fillets on cutting board. Sprinkle both sides with salt and pepper ( I didn't really use pepper because Lissa doesn't like it). Cut fillets in 1 1/2 x 3 inch pieces.

In a mixing bowl, combine 1 cup + 2 TBSP flour, 1 TBSP Baking Powder, 1 tsp Lemon Zest, 1 1/2 tsp salt. Whisk in 1 cup water and 2 XL eggs.

Pour 1/2 inch Vegetable Oil into a large frying pan and heat to about 360 degrees. Dip each fillet into the batter, then place carefully into hot oil. Don't crowd pieces. Keep oil between 360 and 400 degrees. Cook fish on each side for 2 - 3 min, until lightly browned and cooked through. Remove to a plate lined with paper towels. Sprinkle with salt and serve.

Comments: Sounds so easy right? That is what I thought. This will be a definite winner...... wrong! Let's look at the many ways that I messed this one up. First of all, I asked for 3 fillets at the grocery store. Not 3 lbs. Big difference. I didn't realize my mistake until I was about to start cooking. I had to run to the store to get 2 more lbs of fish. The fish was really hard to cut. I don't know if maybe there was something wrong with the fish itself, but this was a challenge. Next mistake.... I didn't have a thermometer for my oil. Big, big mistake. Next time I will use my deep fryer that has a thermometer. Because of that, my fish took forever to cook. They shrunk to almost nothing. We called them "fish nuggets" and most of the pieces wound up chewy, not flakey as you would expect. Oh well! Chalk it up to lack of experience in fish cooking. Uuuuggghhhh! What I thought would be easy was a total pain. I might try a different fish next time. Maybe, it just wasn't very fresh. It was tough to begin with and I think that added to the chewiness of the end product. Also, the batter was good, but was not thick. I might try a different batter next time that is really thick and crunchy. I need a winner in the main dish category. I have tried it twice, and both times did not really work. Well, third times the charm :)


Comments by Lissa: Well...another entree bites the dust!  Haha I couldn't eat much of it because the flavor turned out great  but the fish was super tough for some reason, even when she cooked it for a shorter period of time. I give Sis props for trying to fry fish for the first time, but something definitely went wrong.  Maybe we had a bad batch of fish or used the wrong kind of fish....Any suggestions of the best fish to use?


Comments by Mom:  Overall I thought the fish turned out great.  It was very tasty.  I just think either we had one package of old fish or we cooked it too long.  Then the second package of fish was fresher and was not as tough as the first one.  Fish does not take very long to cook at all.  It seemed like it cooked forever.  Also using a deep fryer may have been the other secret. 


Melissa: Side Dish
Serves 6
Prep Time: 20 Minutes
Cook Time: 35 Minutes
Source: Ina Garten Barefoot Contessa Family Style Cookbook

Ingredients/Directions: Preheat oven to 400 degrees. Scrub 4 large baking potatoes, then cut them in half lengthwise, then each half into thirds. Place on a sheet pan with 4 TBSP Olive Oil, 1 1/2 tsp salt, 3/4 tsp black pepper, 1 tsp minced fresh garlic, and 1 tsp, minced fresh rosemary leaves. Toss all ingredients together, making sure all potatoes are covered with oil. Spread in a single layer, cut side down.

Bake for 30-35 minutes, turning to the other side after 20 minutes. Bake until they are lightly browned, crisp outside, and tender inside. Sprinkle with salt and serve immediately.

Comments: I thought these were going to be like french fries, but they turned out to just be potatoes. The flavor was great, they were super yummy! The only thing is that they were really big so I cut the potatoes in half and then cut each half into fours.  I would use these in addition to any entree, so easy to prepare and cook.  Looks like my potatoes were the winner of the evening.  Yesssss!!!  =)

Comments by Mom:  The potato wedges were extra yummy.  I thought they were great.  I want to make
them myself as they seemed super easy to prepare.  They had the greatest taste.

Comments by Tammy: Can I say, Yum?  These were great!  So delicious, so easy, and can go with almost anything.  I think the only thing that I might change is to let them cook a little longer to make them slightly crunchy on the outside.  That is completely preference though,  because having them soft is fabulous too.  Good job sister.  This one is definitely a keeper!!!

Janice:  Dessert
Serves 4-7
Prep Time:  15 minutes
Source:  Best Recipes by Ceil Dyer

1  6 oz. package semi-sweet chocolate morsels
1 6 oz. package butterscotch morsels
2 Tbs. peanut butter
4 cups Kellogg's Rice Krispies cereal
Melt chocolate, butterscotch morsels and peanut butter
together in top section of double boiler over hot but not
boiling water, or in heavy saucepan over very low heat,
stirring constantly until well blended.  Remove from heat. 
Add Rice Krispies:  stir until well blended.

Drop by level measuring tablespoon onto waxed paper or
buttered baking sheets.  Let stand in cool place until firm.
Makes about 4-dozen Choco-Scotch Clusters, 1-1/2 inches
in diameter.

Note:  Mixture may be pressed into buttered 9 x 9 x 2 inch
square pan.  Cut into squares when firm.  Yields 3 dozen
1-1/2 x 1-1/2-inch Choco-Scotch Clusters.


Comments:  This was a very lite and delicious dessert.  Everyone seemed to love it.  It was so easy to make and it was such a hit.  I have already made it again.

Comments by Tammy:  This dessert was good.  I do have to say that the butterscotch flavor, personally, is not my favorite.  I think that I would have like it better if the butterscotch chips had been replaced by peanut butter chips.  My husband and daughter, however, could not get enough of them. I love the texture of them and the chocolate flavor.  It is one of those desserts where you could easily eat several servings before realizing you ate too much :)

Comments by Lissa:  This dessert was yummy and different, never tried anything like it before...that's for sure.  But, I agree with Sis though, butterscotch is not my favorite and I would have like to try it with peanut butter as well.  But what can we say, we are peanut butter lovers! However, I am very proud of Mom for straying away from the 5 ingredient cookbook and trying something different, even though I still think it was too easy for her.  But it was funny to watch her try and melt the chocolate on our make-shift double broiler (or whatever it's called).  Haha Love Ya Mom ;)


Search Engine Submission - AddMe

January 21, 2010


Tammy
Side Dish: Almost-Famous Cheddar Biscuits
Prep Time: 25 Min
Cook Time: 15 Min
Source: Food Network Magazine, Oct 2009 issue
Ingredients/Directions: Preheat oven to 425 degrees. Mist cooking spray on a large cookie sheet. Make the Biscuits: Pulse 1 3/4 cup flour, 1 Tbsp plus 2 tsp baking powder, 2 1/2 tsp sugar and 1/4 tsp salt in a food processor. Add 3 Tbsp vegetable shortening (room temp) and pulse until combined. Add 4 Tbsp cold, unsalted butter (cut into 1/2 inch pieces) and pulse until butter is in pea-size pieces. Add 6 oz. grated yellow cheddar cheese and pulse 2 to 3 times. Then pour in 3/4 cup whole milk and pulse until mixture is moistened and forms a shaggy dough. Turn dough onto a clean surface and knead until the dough comes together. Do not overwork the dough or the biscuits will be tough (this is what I feared the most ). Drop the dough onto the baking sheet in 1/4 cup portions, 2 in. apart and bake until golden. Mine cooked for 15 min.

While baking melt 3 Tbsp unsalted butter with one smashed garlic clove in a pot over med heat and cook for 1 min. Remove from heat and stir in 1 Tbsp finely chopped parsley. When biscuits come out of the oven, brush the garlic butter over the top and serve. Makes about 12 biscuits.

Comments: Let me forward this by saying I was nervous about this recipe. This is supposed to be a copycat recipe of Red Lobster's cheddar biscuits. Being such a big fan of their biscuits, it was a scary endeavor. This is one of those recipes that I told myself I would try someday, but most likely would never get around to ( I have lots of those). But, this challenge that we have taken on, encouraged me to try it. Why let it just sit there unattempted? I had never made any kind of biscuit before and when it said if you overwork the dough it will turn out tough, I was sure that was where my biscuits would go. To the land of too tough to eat :) Actually though, this recipe was super easy. Who doesn't love to make something where the food processor does all the work for you? These actually turned out really good. Very good flavor and they weren't tough, YAY!!!! Were they as good as Red Lobster? No. However, I think that they could be really close if you double up the garlic butter and be very generous with the amount put on the biscuit. It soaks right into the biscuit. Yum. Also, when reflecting back on them this morning, I think I would take the advice of my 7 year old and cook them less time in the oven. One of the best parts of the Red Lobster ones is how soft they are. Mine were a little crispy on the outside. Maybe I would try to cook it at 12 minutes and see what happens. Regardless, I was proud of myself for taking this one finally on :)

Melissa: I was proud of sis for trying a biscuit recipe...I definitely won't be trying one of those anytime soon. I remember the one and only time I have ever tried to make bread sticks they turned out like 12 inches long and hard as a rock =). Anyways, these were very yummy. I don't know if anyone can make a Red Lobster biscuit just like they do - but these were close and if you double the garlic that's rubbed on top, I think it will be perfect.


Janice: These biscuits were srcumptious. I loved them. They were a little like my recipe, but we all decided that adding a litting more topping at the end would probably make them more moist. But, overall they didn't really need anything. Tammy was very nervous and I was nervous for her, but I new it would all come out all right in the end which it did.


Janice
Entree: Chicken Noodle Casserole
Source: The Four Ingredient Cookbook
Prep Time: 30 minutes
Cook Time: 1 hour
Ingredients/Directions: 1 (8 ounce) package egg noodles, cooked and drained 1 can cream of mushroom soup, undiluted 6 chicken legs or thighs paprika Heat oven to 350 degrees. Combine cooked noodles and soup. Place into a casserole pan. Arrange chicken on top of noodles. Sprinkle with paprika. Cover and bake at 350 degrees for 1 hour or until chicken is tender.


Comments: I was very pround of myself for having tried this recipe. However, I discovered that it was very dry. So the conclusion by me was that when I made that recipe again, I would put in more cream of mushroom soup so that it would not be so dry. Also to add some seasoning to the chicken. As we were talking about it later, it donned on Tammy that instead of doubling the recipe, I had quadrupled it. This meant that I would have needed to add 2 more cans of soup. No wonder it was so dry. Well, live and learn. I was funny when I thought about it. Next meeting I am going to really challenge myself and see what I come up with.

Tammy: Mom thought she doubled the recipe, but she had actually quadrupled the amount of noodles. She put in 2 lbs of noodles, but only doubled the other ingredients. Dish turned out pretty dry and the chicken was not seasoned. I think that if she had stuck to the recipe and had seasoned the chicken it would have turned out okay. Ok Mom, time to step it up a notch. Get way out of your comfort zone and do something really challenging. One thing that we all realized last night was out of the 3 times that we have done this, we have each had trouble on our main dish night. What is that old saying? "The apple doesn't fall far from the tree?" Ha, ha.


Lissa: We realized, after the fact, that mom had tripled her amount of noodles and not the rest of the recipe, so the noodles and chicken were both dry...and the chicken didn't have any seasonings. I think with the way the recipe was written and some seasonings on the chicken it would have been great! And, I love cheese so I think a little cheese on top would have been perfect. Sis and I both challenged mom to try a recipe that wasn't out of the "4 ingredients cookbook" so she can really try something that's different".


Melissa
Dessert: Peanut Butter Chocolate Bars
Prep Time: 35 minutes
Cool Time: 1 hour
Ingredients/Directions: 1 1/2 sticks of butter or margarine, melted 2 cups graham cracker crumbs 2 cups powdered sugar 1 cup of peanut butter 1 bag of semi-sweet chocolate chips 1/2 cup peanut butter Melt on stove butter and 1 cup of peanut butter. Meanwhile mix together graham cracker crumbs and powdered sugar in bowl. Stir in melted ingredients and spread into ungreased 13x9 inch pan (suggested to use wax paper on bottom). Place in freezer for 15 minutes. Meanwhile melt chocolate and remaining peanut butter in metal or glass bowl over simmering water. Then spread over prepared crust and refrigerate for 1 hour. Cut into squares and serve.


Comments: I loved, loved this dessert! It was super easy, even for me (haha) and I'm not sure how anyone could mess this up (other than maybe burning the chocolate, which I have done in the past). Of course, I'm not saying I didn't make a mess in the process LOL. I poured powdered sugar all down the front of my shirt and on my shoes and dumped the bag of chocolate chips all over the floor and counter. Don't ever expect me to be in the kitchen and not make a total mess, even if the recipe calls for one ingredient! My only complaint was that the chocolate was too thick on top and the crust was too thin, so I think that if I had just used 1 1/2 cups of chocolate chips and only 1/4 cup of peanut butter for the topping, it would have been great and maybe try using a small square pan (like 9x9) so the crust is thicker because it was sooo good! Also, it is very sweet so very small portions go a long way, it probably could serve 15 people. Oh! And I would love to try it with crunchy peanut butter. Yum


Tammy: My sister makes me laugh every time we are in the kitchen together. We are a lot alike in the fact that we make a total mess when cooking. Luckily I got through last night unscathed, however I can't say the same about Lissa's shirt and shoes :) Regarding the recipe, can I just say, YUM! I loved them. Super delish and looked so easy. I think the amount of chocolate on top is a preference. I might try milk chocolate next time. Other than that, I would leave it as is. What we learned about dessert is that it tends to be much easier than the main dish. We have all been winners when it was our turn for dessert. Really though, dessert is the most important place to shine right? After all, it is the best part of any meal :)


Janice: Well my daughters are right. No matter what kitchen we are in we do have fun. In fact we always have the biggest mess when we are trying to put a meal together. Normally this would drive me crazy because I am sort of a neat freak, but for some reason I don't evey think about it then. I loved this recipe. Of course, I am a peanut butter and chocolate freak anyway.


Tammy:  Devyn wanted to get in on the action.  She made up her own recipe.  She stirred peanut butter with chocolate chips, crushed graham crackers, and roasted peanuts and put it on a graham cracker.  It was pretty good.  Loved the chocolate in it.


Our First Attempt in 2010

Check us out on You Tube!


Janice

Appetizer:  Hidden Valley Ranch Cheese Puffs
Source: 

Prep Time:  10 minutes
Cook Time:  3 minutes
Serves:  10
Ingredients:
2 cups shredded sharp cheddar cheese
3/4 cup mayonaise
1 tablespoon Hidden Valley Ranch Milk Mix
10 (1 inch) slices French bread

Mix first three ingredients.  Spread on bread slices.  Broil until golden brown (about 3 minutes).

Comments:  This recipe was so easy as far as appetizers go.  In fact I thought it was too easy, but that was good for me not being a cook.  I had my reservations at first about its taste, but it turned out pretty good.  I think I spread the mixture too thick on the bread as it was too cheesy.  Next time I make it, it will be just a thin layer.  This also kept the bread from getting crisp.  Also I think just a little less mayonaise, about 1/4 cup less would help the taste also.  But, overall it was very good.

Comments on Hidden Valley Ranch Cheese Puffs from Tammy: Ok, first of all, the name is kind of weird.  It doesn't really fit the dish.  It is really a cheese bread.  I liked this recipe.  It was easy and tasty.  Mom put a lot of the cheese mix on top of the bread, it looked delicious, but was too much.  However, I think that if you just put a small amount on top and let it broil until bubbly and brown it would be perfect.  We look forward to retrying these recipes in the future and making the adjustments.  Fun to see Mom cooking and trying new things.  So fun!


Comments on Hidden Valley Ranch Cheese Puffs from Lissa: This was a super easy appetizer that was very tasty.  I think it just depends on what type of bread you are using as to how much cheese to put on.  The cheese mix is very flavorful so a little amount goes a long way.  I have so much fun learning with mom and sis and I look forward to the weeks when we are cooking.  We just laugh all night - and we have vowed to "walk off the calories" every Friday following these adventures =)


Melissa
Entree: Chicken al la Donna
Source: Friend's family recipe

Prep Time: 30 minutes
Cook Time: 1 hour
Serves: 6

Ingredients:
6 boneless skinless chicken breast
8 oz Velvetta cheese
2 small cans unsweetened condensed milk
1 can cream of chicken soup
1 bag of penne noodles

First pour in crock pot Velvetta cheese, condensed milk and cream of chicken soup. Turn crock pot on high. Meanwhile, boil noodles until somewhat tender and cook chicken. Then add chicken and noodles to crock pot, stir up and cook on high for 1 hour.

Comments: This was one of my all time favorite recipes that my friend's mom (Donna) used to cook for us kids...I would always beg for it when I was over for dinner.  Unfortunately, I got a hold of the recipe and totally messed it up!  I used what I had in my kitchen which was sweetened condensed milk and that was a huge mistake.  I had no idea that it would totally change the result but I guess we all make mistakes and I will definitely not make that one again :)  Anyways, if I had used the regular condensed milk I really think it would have been perfect...the consistency was great and it had just enough cheese.

Comments on Chicken a la Donna from Mom:  We laughed a lot that night.  My seven year old granddaughter is out official taste tester and she couldn't eat very much.  However, she already had seen Lissa's and her mom's reaction to her dish.  The sweetened condensed mild made it very sweet.  I was brave and ate about a third of my dish.  I really didn't think it was that BAD.  But Lissa learned her lesson and now knows what to do.  I have to admit these nights are so much fun. I don't know why we didn't do them before, but better late than never.

Comments on Chicken a la Donna from Tammy: Ok, I have to admit that maybe this mistake was my fault.  First, When I envisioned our cooking nights I pictured just this very thing.  A big mistake that made the food almost inedible that we would all laugh about.  Second, the alarm went off in my head when she had me add sweetened condensed milk.   With chicken and pasta?  Hmmmm, that didn't sound right.  But, nevertheless I wanted to trust the process.  When we scooped it up to serve, it looked so delicious, but I wish you could have seen Lissa's face when she tried that first bite.  I had to laugh.  Lissa didn't mention to you that she threw her pasta away and made what she called, "the no fail Pasta Roni."  So funny! Thank goodness she had something else in the cupboard.  Love ya Sis!


Tammy
Dessert: Apple Enchiladas
Source: Adapted from website
Prep:10 Minutes
Cook: 20 Minutes


Ingredients
1 (21 ounce) can apple pie filling
6 small, soft taco sized, flour tortillas
ground cinnamon - I did not measure cinnamon, just went for it
1/3 cup margarine
1/2 cup white sugar
1/2 cup packed brown sugar
1/2 cup water


Spoon pie filling evenly onto all tortillas
(my daughter helped me with this step. Very fun for the kids ), then sprinkle with cinnamon. Roll up tortillas and place seam side down on lightly greased baking pan
( I used a 13" x 9" pan)  Bring margarine, sugars and water to a boil in a medium sauce pan. Reduce heat and simmer, stirring continually for 3 minutes. Pour sauce over tortillas, evenly; sprinkle with extra cinnamon on top. Bake in 350 degree oven for 20 minutes. We cut the tortillas in half and served with vanilla ice cream. Can serve 6-12, depending on portion size of dessert.


Comments : Let me just say that having this cooking night with Mom and Lis has been something we have talked about for so long. I am so proud that we are finally doing it. It only seems fitting that we document our experiences not only with cooking, but with each other. We are bonding over recipes :) Who is tasting these recipes you might ask? Well my 7 year old daughter claims to be the official taste tester. She is definitely our biggest critic. Then it is judged by whoever is there that night. This particular evening was my Dad which is perfect because he is will eat anything :)


The above recipe was super yummy and really easy. The only cooking really involved is the sauce and it was well worth it. I would definitely make this again. I stuck to the recipe exactly. The only think that I forgot was to put the extra cinnamon on top before I baked it, but that was no biggie, I just sprinkled it on when I took it from the oven. Delish! This could probably be done with any canned pie filling. Would love to try blueberry.


Comment on Apple Enchiladas from Lissa: I loved this desert! Thought it was really unique and I loved the sauce.  A small scoop of ice cream on top was a perfect addition.  However, I would suggest serving only 1/2 of one enchillada because a whole one was too much.  Which is great because this desert could serve 12!


Comment on Apple Enchiladas from Mom: This was a very tasty dessert.  I discovered that I could only eat a half enchillada.  This dessert was very light and not heavy which was a good following for the rest of our meal.

About Us

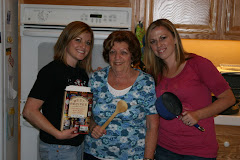
This is a blog about 3 inexperienced cooks, Mother and her two daughters, learning how to cook together. We have decided that in order to learn how to cook, we just need to jump into it and try recipes.

The Challenge: For each of us to try one new recipe every other week, together in the kitchen. One of us will try an appetizer/side dish, one of us will try an entree and the other will try a dessert. Each time we meet we will rotate our tasks.

Janice (Mom)- Retired, sixty-something. Married 36 years. Mother of 5. Grandmother of 7. Great Grandmother of 1. Volunteers at the local library a couple times a week. Cooking experience: Typically prepackaged meals. Would rather not cook and dine out or order take out :)

Tammy (Daughter)- Stay at home mom/Business Owner. 35 years old. Married 11 years. Mother of two (ages 7 and 2). Cooking experience: Can follow a basic recipe ( as long as it is not too complicated or time consuming). Cooks a couple times a week. Does some prepackaged meals (i.e. Mac and Cheese) and some not. Loves to cook :)

Melissa (Daughter) - Full time producer of PBS television show. 27 years old. In a serious relationship. Children and marriage in her future :) Cooking experience: Not much. Tends to make a lot of mistakes when cooking. Seriously ....... she has messed up Pasta Roni :) Loves to cook and anxious to learn.

We will be posting the recipes with pictures, video and our suggestions to make each one better. This shall be very funny as we seriously don't know anything about cooking and we already know we will make too many mistakes to count. However, that is the only way to learn and we are willing to jump in head first. We'd love for this blog to help us document our trials but also allow others to laugh along with us and maybe learn new recipes at the same time. Enjoy!